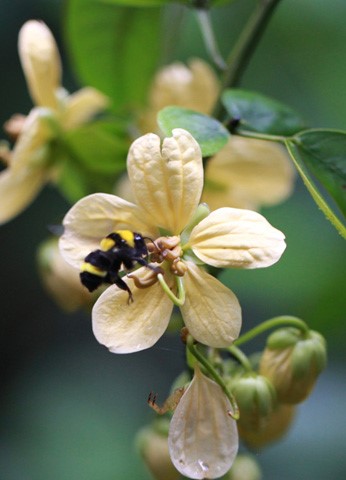
Shrill carder bumblebee (Bombus sylvarum) by Daisy Headley

Shrill carder bee project blog

A queen shrill carder bumblebee on a purple flower

18 February 2019

by Rosie Earwaker from Buglife, Back from the Brink’s Shrill Carder Bee Project Officer

Hints of spring are in the air. Bulbs are peeking up through the soil, with plenty of snowdrops, daffodils and crocus already in flower. Sightings of Buff-tailed bumblebees in gardens are more and more frequent as the days grow longer. It won’t be long now until different bumblebee species join them, although we will have to wait a couple more months until the high pitched buzz of our Shrill carder bee returns. It certainly won’t be a silent spring this year, but where will we be in 100 years’ time?

You may have seen the headlines recently about a study predicting that we could lose 41% of the world’s insect species in the next few decades. If the rate of loss continues, this could mean that within a century there will be a very small proportion of insects left on the planet. This is staggering and would be catastrophic to life on earth.

To those of us who study insects, this so called “insectageddon” is sadly nothing new; study upon study has been documenting these declines for years, decades even. However, this recent review paper has gone one step further, bringing all of this research together to really put a spotlight on the challenges we are currently facing. Habitat loss, pesticides and climate change are some of the main factors driving these extinctions. So what can be done?

We need to start taking biodiversity loss more seriously. This isn’t just for the politicians at Westminster and across the globe to action; you can also make a difference. From planting pollinator friendly plants and ditching the slug pellets, to shopping for more local, seasonal produce. Small actions can make a big difference.

Headlines like this highlight the importance of initiatives like Back from the Brink and the work of wildlife conservation organisations such as Buglife helping the “small things that run the planet”. There are plenty of ways to get involved with Back from the Brink, including volunteering opportunities. We are always keen to have more people on the look out for Shrill carder bee and helping to monitor bumblebees through the BeeWalk Scheme, which is vital to our understanding of how these creatures are faring.

Keep an eye out for forthcoming bumblebee identification training courses and lots of exciting surveys over the spring and summer. I start this year with a reinvigorated passion for saving our precious insects and I hope you do too.

Bombus affinis by USFWS

Bumblebees of the World Blog Series… #3 Bombus affinis

The Rusty patched bumblebee, Bombus affinis

By Elizabeth Franklin, Bumblebee Researcher, Guelph, Canada

This month’s Bumblebees of the World blog is written by Bumblebee Researcher, Elizabeth Franklin, from the University of Guelph, who focuses on the plight of a critically endangered bumblebee in North America.

Fact File

Latin name: Bombus affinis

Common names: Rusty patched bumblebee

Colour pattern: Workers, queens and males have a yellow collar, black band or circle followed by another yellow band on the thorax. Workers and queens have two, mostly yellow bands at the top of the abdomen whereas males have a rusty patch on the top of their abdomen giving the species its name.

Favoured flowers: Generalist but reported on hyssops, prairie clovers, sunflowers, blueberries, the apple family and goldenrods.

Global region: East Nearctic region (North American temperate region)

Geographic distribution: Canada (Ontario), United States (Wisconsin, Virginia, Tennessee, Ohio, Iowa, Indiana, Illinois, Connecticut, Maryland, Massachusetts, Minnesota)

Conservation status: Critically Endangered

Bombus affinis or the Rusty patch bumblebee is a large, short tongued, bumblebee that was, until relatively recently, abundant throughout its range in North America and Canada. Like many other bumblebees, it nests in underground cavities but its queens emerge earlier than those of many other North American bumblebee species. Bombus affinis used to be so abundant that there are reports of them within Toronto. However, Bombus affinis has now been recognised as Critically Endangered by the ICUN after an >80% decrease in its former range. Its endangered status has been recognised in Canada since 2014 and the United States since 2017. Bombus affinis is the first bumblebee to be recognised as endangered in the United States and this status was only awarded after extensive public petitioning through the Xerces Society.

The reasons for the decline of Bombus affinis are not completely clear but pathogen spill over from managed bumblebees for greenhouse pollination is hypothesized as the major cause. The decline of this bumblebee and its close relatives correlate closely with the timing of increased infection rates of a bee pathogen Nosema bombi, thought to originate from imported commercial bumblebee colonies. In addition, urbanisation, intensification of agriculture, pesticides and climate change are thought to have also contributed to this bumblebee’s decline.

The last recorded sighting of the Rusty patch bumblebee in Canada was in 2009. Since then increased survey efforts have detected Bombus affinis in the Northern United States but have yet to find evidence of this species in its former Canadian range. This increased surveying is largely due to the extensive contributions of citizen scientists sending their photos to Bumblebee Watch for expert validation. Records are collected for all North American bumblebee species but the map below just shows the validated records for Bombus affinis.

The contributions of citizen scientists have allowed experts to find the strong holds of Bombus affinis and protect those populations. These areas and their Bombus affinis populations are now being studied to gain insights into how this species can be conserved and why they are declining elsewhere. In addition to this, scientists and conservation organisations have greatly invested in public engagement, encouraging citizens to grow pollinator gardens and contribute to the Bumblebee Watch programme. The story of Bombus affinis illustrates what we, as the public, can do to raise awareness, protect and hopefully restore our endangered bumblebee species.


Links to further information:

IUCN red list

NHM Bumble bees of the world

Xerces Society Bombus affinis

A ghost in the making: Searching for the Rusty patched Bumblebee

Group of buff-tailed (Bombus terrestris) males by Gaynor Griffiths

Smelly male bumblebees!

A group of Buff-tailed bumblebee males huddled together asleep on a flower.

By Cathy Horsley, Conservation Officer West Country Buzz

This summer, I learnt that different species of male bumblebees have different scents. I use a marking cage to examine bumblebees on my surveys to get a good close up look to identify them, and the male bees sooner or later released a puff of perfume.

Red-tailed bumblebees and Early bumblebees have a pleasant citrus smell, whereas the Buff-tailed bumblebees are more like smelly feet!

The odour comes from the release of pheromones, which are chemicals used to attract queens. By having their own distinctive aroma, males can be sure of attracting females from the same species.

Ever since Darwin’s day, and even earlier, male bumblebees have been observed following a set flight path. They tend to follow a linear circuit and pause at various places along the route to deposit a drop of pheromone. It has been noticed that males will temporarily leave their flight path, often in the early afternoon, to refuel on flowers. Different species will fly at different heights, or at different times of day, which also helps males to find the right species of female. By attracting queens to a particular place, males also avoid trying to mate with workers. Patrolling males on the lookout for queens is a fascinating subject, not least because although this is often observed, mating is rarely seen.

Red mason bee (Osmia bicornis) Bex Cartwright

Winter husbandry for solitary bees

A Red mason bee female dusted in pollen and sitting on a yellow flower.

17 November 2017

By Ron Rock, Bumblebee Conservation Trust Volunteer

And so, we reach the end of another bee year. As I write, there are just a few Common carder bees still in the garden. The Red mason and Leaf-cutter bees are long gone but mud and leaf filled tubes in the bee nesters are evidence that their work has been done. Another generation is already in place and will emerge next spring and summer. But will it? Are bee nesters a fit and forget option in our gardens? Will the bees emerge and happily go on year after year? Sadly, the answer is probably not.

By attracting these bees to our gardens, we are encouraging them to nest in far higher densities than would occur in nature. As a consequence, parasites find bee nesters just as welcoming as the bees themselves. Left unchecked, pests and disease can completely wipe out your bee nester population in a relatively short period of time. It should be our duty to open, inspect, clean, and replace used nesting tubes annually to ensure the health of our solitary bee guests.

The ‘unwanted guests’ in the bee nesters include mites, flies and parasitic wasps which can all have a highly detrimental effect on the intended occupants. No matter how well maintained, bee nesters will attract a certain amount of unwelcome attention during the course of a season.

When all of the activity has ceased, I move my nesters into a sheltered part of the garden to protect them from rain and to allow the bees to pupate and metamorphosise into adult bees to take place. In nature, the bees would remain quiescent in their cocoons until spring, but at this point I step in and give them a helping hand. I use a combination of routed out trays, cardboard tubes with paper liners and — although some would frown upon it — bamboo tubes drilled out to appropriate sizes. I have never had a problem with bamboo, and I have found that the number of parasitised or failed cells is about equal in all three types of nesting cavity.

The ‘Pests’

(Details of the lifecycles of the following creatures are available on the internet. I will concentrate on illustrating how to keep their numbers in check for the sake of the bees.)

Mites

(Chaetodactylus osmiae). Bamboo cane on opening above. One cell is heavily infested with mites. The black specks on the left of the healthy cocoon are larval droppings, this is completely normal. Red mason bee larvae move the droppings out of the way before spinning their cocoon whereas Leafcutter bees incorporate droppings in theirs. The mites are the flesh coloured mass to the right of the yellow powder (mite droppings).

(Cacxoenus indigator) – a cleptoparasitic fly, at least in its larval form. The larvae of Cacxoenus indigator, the assassin fly. These fruit flies enter bee nesters through the tube entrance when the bee is away from her nest. When her eggs hatch, the grubs consume the pollen that was meant for the bee larvae and the bee grub starves to death. If only a few eggs are laid you just end up with a small mason bee, but a larger amount as here means no bee at all.

(Monodontomeros obscurus) – These tiny little wasps can be particularly troublesome, especially in nesters that are populated with thin walled plant stems or unprotected paper straws. Cardboard or bamboo tubes seem to protect against their attacks, at least in my experience. This is a wasp which oviposits up to ten eggs into a cocoon. The resulting larvae then eat the developing bee and overwinter as fully developed larvae within the infested cocoons. Reject any cocoons that don’t feel ‘right’. A healthy cocoon is firm to the touch, though male cocoons sometimes have dimples in them. Keep any you are not sure of in an escape proof container and see what emerges in the spring.

Safe opening of bamboo tubes

It can be a little dangerous opening bamboo tubes as I found out to my cost a few years ago. To do it safely you all you need is a simple device. This consists of a length of 75mm x 50 timber screwed to a base of 150 x 25. Two holes about 120mm deep are drilled into the 75 x 50 which are large enough for the bamboo tubes to sit in. Then if you insert a sharp knife 10mm deep across the entry end of the tube and twist it left and right the tube will open cleanly. Keep one hand on the knife handle and the other flat on top of the blade for safety. Never allow children to do this unsupervised.

Cleaning cocoons: initially, the cocoons can be cleaned by sieving them in fine horticultural sand, then you can use a soft artist brush to clean, followed with a damp cotton wool pad if required.

Cleaned cocoons, don’t forget to dry them before storage, pat them gently with some kitchen towel then leave them on another piece of kitchen towel to dry for a few minutes. Storing the cocoons when damp can lead to problems with mold which can be simply wiped off should it occur, but why create problems when a little care ensures this doesn’t happen in the first place.

Bamboo tubes should be replaced annually, though ones drilled out to 8mm can have a CJ paper liner fitted and used again. Wooden trays can be cleaned with boiling water, scrubbed with an old toothbrush and left outside to dry before going back in the nester. Tubes and slots should be at least 160mm long. 8-10mm diameter holes are good for red mason bees and 10-12mm for leafcutters. Tubes of 3-7mm may attract other types of bee too. The nesters themselves can be scalded out with boiling water and any maintenance needed doing in the autumn. Store them indoors during the winter, load them with new tubes in the spring and then you can sit back and be richly entertained by these wonderful little bees.

Refrigerate cocoons in plastic trays on a bed of damp kitchen towel. The tub of water keeps up the humidity levels to stop the bees from dehydrating. Add paper towels in the storage trays which should be dry by the way. If stored in a fridge you will need to keep the humidity levels of 60-70% so some sort of humidity indicator will be needed A temperature of around 38 – 40 degrees Fahrenheit is perfect.

Ready for the new season, the box below the nester is a release chamber where the cocoons are placed in the spring. Small nesters like this are easier to look after than the huge ones that seem to be in vogue at the moment. Small is beautiful in my opinion. The flowering currant in the background is a magnet for bees of all types when in bloom, bees at the front door, it doesn’t get any better than that!

Some may say ‘let nature take its course’, but if we put out bee nesters then surely the aim is to increase the population of bees in our gardens. That said, you can reach a bee overload situation in which case I ask friends and neighbours to host a nester in their own garden. By adopting this form of husbandry you can increase the numbers of Red mason bees year after year (given the vagaries of the weather). And if you can get a child or two interested in these lovely little creatures then surely that can only be a good thing!

Look out for another exciting installment in February, when I will give you some advice on putting your nesters outside ready for the new season, and also how to deal with Leafcutter bees. These bees overwinter as pupae so their cocoons should be left well alone until next spring.

If you would like to know more, then please get in touch with ronrock@phonecoop.coop.

Convert your lawn into a meadow!

3 September 2014

We have another guest blog this week, from Bumblebee Conservation Trust supporter Eric Homer. Read on to find out what he did and see his results…

My wife and I are keen on helping wildlife and enjoy encouraging wildlife into our garden. We get a lot of pleasure seeing the birds, bees, butterflies, frogs, newts and insects in the garden, so last year we decided that we’d like to make the garden more bee friendly by converting the back garden lawn into a wildflower meadow, hopefully attracting more wildlife into the garden and helping the bees and other species. Our suburban garden is not large and the lawn only covered a small area, approximately 20m². We wondered if a small area like this would have any effect, but we were not disappointed.

I had a look on the internet for guidance and there were different opinions and ways of going about the conversion. Not sure how to approach the project I sought guidance and advice from the BBCT on the best/easiest way to convert the lawn into a wildflower meadow. Anthony McCluskey from BBCT responded to my enquiry with good advice and guidance.

The most important thing to do when planting a wildflower meadow is to remove as much grass as you can from the area. Some people use herbicide or dig it up, or you can cover it with plastic sheeting for as long as possible. This will destroy any grass underneath, and give you a blank canvas to work from. This is important because grasses will compete with wildflowers, and are the main reason why wildflower areas don’t work.

After that, the seeds can be sown. Do this in autumn or spring, after raking the soil so that it’s fine. You should then cover gently (e.g. by raking again) and water well. You’ll need to keep watering them to make sure they germinate, and after the seedlings come up they should be fine. He provided me with this link to Habitataid where I found more information and links to other resources including seed suppliers, sowing rates etc. which was very useful. This site also has a video to explore the different ways it can be done.

We took the plunge in September 2013. We were only converting a small area so we decided to dig up the turf, still a major job and hard work, and then prepared the ground. We then sowed our seedbed. Preparing the ground and sowing in the autumn can help some wildflowers as some of the seeds fair better if they can germinate over the winter. We thought that this would hopefully give us quicker results.

As it was a small area we decided to go for wildflowers only rather than a wildflower/grass mixture. We used seed sent to us by the BBCT when we joined, some we’d collected ourselves on our walks and bought some from one of the suppliers recommended by habitat aid. I don’t think it stopped raining since we sowed so watering wasn’t an issue.

October was relatively mild and wet and we had shoots coming up in November which we hoped were wildflowers and not rogue grasses. Anthony’s advice was that at this stage the most important thing to do is to make sure that there is no disturbance of the seedlings (just in case you have dogs or cats that like to dig!). Over the winter we seemed to have nothing but rain and the newly seeded meadow was flooded on several occasions giving us concern over germination.

In early spring we decided to plant some plant plugs to add some species not contained in the seed packs that we’d sown. We bought some wildflower plants from the garden centre, split them and distributed them over the meadow. We also added some wildflower plants that were in a friend’s garden.

Slowly but surely the meadow started to develop, they say patience is a virtue. It took eight months from sowing to seeing significant results but the wait was worth it. The photographs to the right below show the early progress.

The meadow, although in the infancy of its first season, has attracted greater numbers and varieties of hoverflies, moths and butterflies. The goldfinches and sparrows have also taken a liking to the cornflowers. The numbers of bees in the garden has also increased dramatically. They seem particularly attracted to the cornflowers, scabious and bird’s foot trefoil.

Two hoverflies that we have not seen in the garden before that were easier to identify are the Large pied or Pellucid Hoverfly (Volucella pellucens) and a hornet mimic hoverfly (Volucella zonaria). Butterflies new to the garden are the Common Blue, Meadow Brown, Ringlet and Small Skipper, all seen on the meadow. We’ve also had our first 6 spotted Burnet moth in the meadow.

We are very pleased with the results so far, we are enjoying the experience immensely and excited to see what else might spring up next year or be attracted into the garden.

Check out more planting guides and resources with our Bee the change campaign here.